
主题
Eslint + Prettier + lint-staged + husky规范前端代码风格
一. 插件介绍
husky:是一个代码提交钩子。即在代码被提交到Git仓库之前,我们可以在这里做一些预检查或者格式化,需要做这些操作,我们需要一个Git的提交钩子,简单说就是使用Git命令会触发的函数。
lint-staged:是一个前端文件过滤的工具。是一个仅仅过滤出Git代码暂存区文件(被 committed 的文件)的工具。Lint-staged 仅仅是文件过滤器,不会帮你格式化任何东西。
Eslint: ESLint 是一个语法规则和代码风格的检查工具,可以用来保证写出语法正确、风格统一的代码。
Prettier : eslint 虽然能检查大部分代码不规范的地方,但有两个地方却无能为力: 1. 不能针对格式美化 2. 不能美化 vue 中模板代码 Prettier 是一个代码格式化 (风格美化)工具,但并非针对一种语言,对 HTML/CSS/JavaScript/Vue/SCSS 都有效果。可以通过配置文件在不同项目间统一代码格式化,以修正不同编辑器/IDE 之间格式化不同的问题。
二. 项目参考配置
由于husky不同版本之间存在差异,从 husky5 开始版本有了重大变化,旧的配置方式无法直接使用,因此这里给出两个版本之间的不同配置方案
1 旧版的husky(5.0.0以下, 例如:4.2.5)
1.1 安装依赖
bash
npm install -D eslint eslint-config-prettier eslint-plugin-prettier eslint-plugin-vue husky@4.2.5 lint-staged prettier旧版依赖版本如下 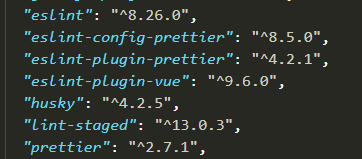
1.2 根目录下新建.githooks目录, 并新建讲个文件 /.githooks/commit-msg , /.githooks/pre-commit
commit-msg 中添加如下内容, 主要作用用于校验 git commit 后面的内容格式以及提交人是否有权提交代码
sh
#!/bin/sh

# 用 `` 可以将命令的输出结果赋值给变量
# 获取当前提交的 commit msg
commit_msg=`cat $1`

# 获取用户 email
email=`git config user.email`
# 根据需要修改正则即可
msg_re="^(feat|fix|docs|style|refactor|perf|test|workflow|build|ci|chore|release|workflow)(\(.+\))?: .{1,100}"

if [[ ! $commit_msg =~ $msg_re ]]
then
    echo -e "\e[31m不合法的 commit 消息提交格式,请使用正确的格式: \e[0m"
    echo -e "\e[31mfeat: add comments \e[0m"
    echo -e "\e[31mfix: handle events on blur (close #28) \e[0m"
    echo -e "\e[31m详情请查看 git commit 提交规范:https://github.com/woai3c/Front-end-articles/blob/master/git%20commit%20style.md \e[0m"


    # 异常退出
    exit 1
fi
# 对用户权限做判断则比较简单,只需要检查用户的邮箱或用户名就可以了(假设现在只有 abc 公司的员工才有权限提交代码)。
email_re="@abc\.com"
if [[ ! $email =~ $email_re ]]
then
    echo "此用户没有权限,具有权限的用户为: xxx@abc.com"

    # 异常退出
    exit 1
fi
提示,
echo可以输出带颜色的字体:
echo -e "\e[30m 黑色字 \e[0m" echo -e "\e[31m 红色字 \e[0m" echo -e "\e[32m 绿色字 \e[0m" echo -e "\e[33m 黄色字 \e[0m" echo -e "\e[34m 蓝色字 \e[0m" echo -e "\e[35m 紫色字 \e[0m" echo -e "\e[36m 天蓝字 \e[0m"
pre-commit 中添加如下内容, 主要用于执行 lint-staged ,在代码检查不通过时候终止git操作
sh
#!/bin/sh
npm run lint-staged  --allow-empty

# 获取上面脚本的退出码
exitCode="$?"
exit $exitCode
文件层级如下 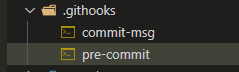
1.3 配置package.json
在 package.json中加入如下内容
json
  "husky": {
    "hooks": {
      "pre-commit": "node ./.githooks/pre-commit",
      "commit-msg": "node ./.githooks/commit-msg $HUSKY_GIT_PARAMS"
    }
  },
  "lint-staged": {
    "src/**/*.{js,vue,css,scss,sass,less}": [
      "prettier --write",
      "eslint --fix",
      "git add"
    ]
  }
在"scripts"中加入命令
shell
"lint-staged": "lint-staged",
"postinstall": "git config core.hooksPath .githooks" // 用于将githooks目录指向我们自己创建的.githooks
1.4 添加.eslintrc文件
json
// .eslintrc内容
{
 "root": true,
 "env": {
  "browser": true,
  "node": true,
  "es6": true
 },
 "extends": [
  "eslint:recommended",
  "plugin:vue/essential",
  "plugin:prettier/recommended" // 这行要放到数组最后,作用是处理eslint与prettier规则冲突的
 ],
 "parserOptions": {
  "ecmaVersion": 2020,
  "sourceType": "module"
 },
 "rules": {
  "prettier/prettier": "warn",
  "arrow-parens": 0,
  "no-console":"warn",
  "no-debugger": "warn",
  "no-unused-vars": [
  "off",
  {
   "ignorePattern": "^_"
  }
  ],
  "avoidEscape": 0,
  "space-before-function-paren": 0,
  "generator-star-spacing": 0,
  "semi": [0],
  "indent": ["off", 2],
  "no-multi-spaces": "warn",
  "no-prototype-builtins": "warn",
  "no-undef": "warn",
  "prefer-const": 0,
  "key-spacing": [
  0,
  {
   "singleLine": {
   "beforeColon": false,
   "afterColon": true
   },
   "multiLine": {
   "beforeColon": true,
   "afterColon": true,
   "align": "colon"
   }
  }
  ],
  "vue/no-multiple-template-root":"off"
 }
}
1.5 添加ignore文件
shell
#  .eslintignore文件
dist
node_modules
1.6 添加.editorconfig配置文件
shell
[*]
charset=utf-8
end_of_line=crlf
insert_final_newline=false
indent_style=space
indent_size=2

[{*.ng,*.sht,*.html,*.shtm,*.shtml,*.htm}]
indent_style=space
indent_size=2

[{*.jhm,*.xslt,*.xul,*.rng,*.xsl,*.xsd,*.ant,*.tld,*.fxml,*.jrxml,*.xml,*.jnlp,*.wsdl}]
indent_style=space
indent_size=2

[{.babelrc,.stylelintrc,jest.config,.eslintrc,.prettierrc,*.json,*.jsb3,*.jsb2,*.bowerrc}]
indent_style=space
indent_size=2

[*.svg]
indent_style=space
indent_size=2

[*.js.map]
indent_style=space
indent_size=2

[*.less]
indent_style=space
indent_size=2

[*.vue]
indent_style=space
indent_size=2

[{.analysis_options,*.yml,*.yaml}]
indent_style=space
indent_size=2
1.7 添加.prettierrc
json
{
    "arrowParens": "always",
    "bracketSpacing": true,
    "endOfLine": "auto",
    "htmlWhitespaceSensitivity": "css",
    "insertPragma": false,
    "jsxBracketSameLine": true,
    "jsxSingleQuote": false,
    "printWidth": 120,
    "proseWrap": "preserve",
    "quoteProps": "as-needed",
    "requirePragma": false,
    "semi": true,
    "singleQuote": false,
    "tabWidth": 2,
    "trailingComma": "es5",
    "useTabs": false
}
1.8 初始化husky
首次配置了以上配置之后,需要执行npm install命令,之后husky会自动执行"postinstall"里面的命令,将本地的githooks关连上
1.9 测试
在项目中故意配置一些错误的格式, 执行, git add ., 接着 git commit -m "feat: 测试husky" 看效果, 会自动将有改动的文件按我们配置的配置格式化, 若如法格式化的会报错, 中断git流, 下面是没有报错的情况 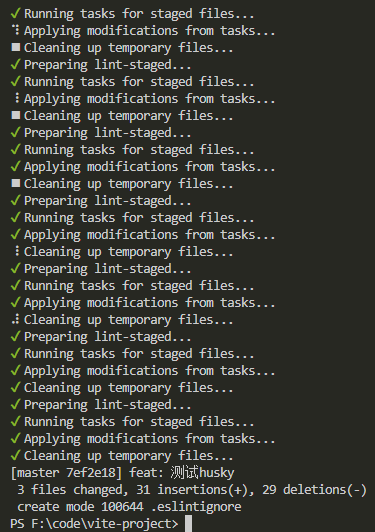
2 新版husky + commitlint
A. commitlint介绍
commitlint : commitlint 推荐我们使用 config-conventional 配置去写 commit commitlint - github文档地址
提交格式(注意冒号后面有空格)git commit -m <type>[optional scope]: <description>
例如: git commit -m 'fix(account): 修复xxx的bug' git commit -m 'refactor: 重构整个项目'
type :用于表明我们这次提交的改动类型,是新增了功能?还是修改了测试代码?又或者是更新了文档? optional scope:一个可选的修改范围。用于标识此次提交主要涉及到代码中哪个模块。 description:一句话描述此次提交的主要内容,做到言简意赅。
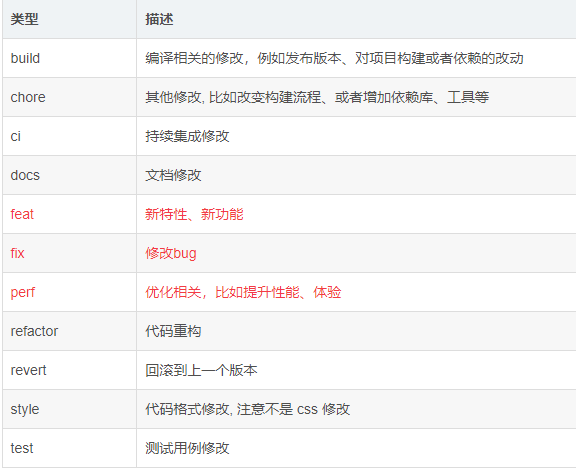
常用的 type 类型
B. husky(新版) + commitlint 配置步骤
1. 安装依赖
shell
npm install -D @babel/core @babel/eslint-parser
npm install -D @commitlint/cli @commitlint/config-conventional
npm install -D eslint eslint-config-prettier eslint-plugin-prettier eslint-plugin-vue
npm install -D husky lint-staged prettier
版本号截图 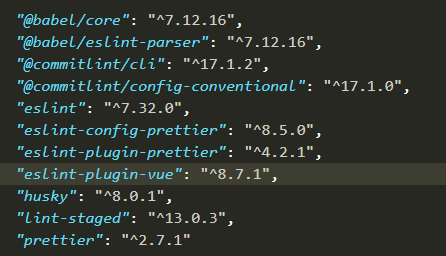
2. 配置package.json
package.json中添加下面配置
json
"lint-staged": {
  "src/**/*.{js,vue,css,scss,sass,less}": [
    "prettier --write",
    "eslint --fix",
    "git add"
  ]
}scripts中添加命令
shell
"prepare": "husky install"3. 添加.eslintrc文件
json
{
    "root": true,
    "env": {
      "node": true
    },
    "extends": [
        "eslint:recommended",
        "plugin:vue/vue3-essential", // 这里为vue3
     // "plugin:vue/essential",  // vue2为这个
     "plugin:prettier/recommended" // 在数组最后, 为了处理eslint与prettier规则冲突
    ],
    "parserOptions": {
      "parser": "@babel/eslint-parser",  // 为了解决eslinet解析错误的问题
      "ecmaVersion": 8, // 为了解决eslinet解析错误的问题
      "requireConfigFile": false // 为了解决eslinet解析错误的问题
    },
    "rules": {
        "prettier/prettier": "warn",
     "arrow-parens": 0,
  "no-console":"warn",
  "no-debugger": "warn",
  "no-unused-vars": [
  "off",
  {
   "ignorePattern": "^_"
  }
  ],
  "avoidEscape": 0,
  "space-before-function-paren": 0,
  "generator-star-spacing": 0,
  "semi": [0],
  "indent": ["off", 2],
  "no-multi-spaces": "warn",
  "no-prototype-builtins": "warn",
  "no-undef": "warn",
  "prefer-const": 0,
  "key-spacing": [
  0,
  {
   "singleLine": {
   "beforeColon": false,
   "afterColon": true
   },
   "multiLine": {
   "beforeColon": true,
   "afterColon": true,
   "align": "colon"
   }
  }
  ]
    }
  }
4. 添加.eslintignore
json
dist
node_modules
5. 添加.prettierrc
json
{
    "arrowParens": "always",
    "bracketSpacing": true,
    "endOfLine": "auto",
    "htmlWhitespaceSensitivity": "css",
    "insertPragma": false,
    "jsxBracketSameLine": true,
    "jsxSingleQuote": false,
    "printWidth": 120,
    "proseWrap": "preserve",
    "quoteProps": "as-needed",
    "requirePragma": false,
    "semi": true,
    "singleQuote": false,
    "tabWidth": 2,
    "trailingComma": "es5",
    "useTabs": false
}
6. 添加commitlint.config.js
commitlint.config.js作用是告诉git, 检查commit-msg时候使用什么规则
js
module.exports = {
  extends: ["@commitlint/config-conventional"],
};
7. 生成.husky 以及 git hooks所需的文件
运行npm run prepare 或者 npx husky install(推荐前者),因为配置了prepare后, 后面还会用到,一劳永逸. 之后自动在根目录生成一个.husky文件夹 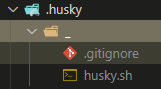
接着,在.husky文件夹(注意不是_文件夹,别搞错了)里面创建所需要的githooks钩子文件即可, 这里我们需要两个文件,如下:
sh
# pre-commit文件

#!/bin/sh
. "$(dirname "$0")/_/husky.sh"

npx lint-staged --allow-empty $1
sh
# commit-msg 文件

#!/bin/sh
. "$(dirname "$0")/_/husky.sh"

npx commitlint --edit $1
最终目录结构: 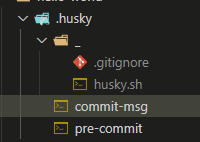
8. 初始化husky
到这里, 就已经完成了所有配置, 需要开始将本地的git hooks重定向到.husky目录才能正常使用.
运行npm install即可.
9.测试, 若commit-msg格式不正确, 会报错如下
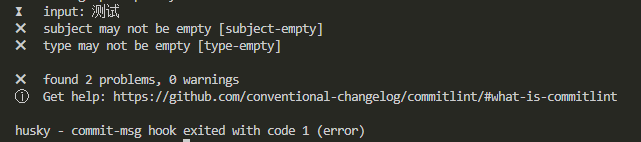
若没什么问题, 则会正常提交,并按照配置的规则格式化修改过的代码
三. CommitLint 提交规范
commitlint 推荐我们使用 config-conventional 配置去写 commit
上面已经介绍了怎么配置commitlint,那么commit时候的规则有哪些, 怎么填写呢, 看下面
bash
# 提交格式(注意冒号后面有空格)

git commit -m <type>[optional scope]: <description>

# type :用于表明我们这次提交的改动类型,是新增了功能?还是修改了测试代码?又或者是更新了文档?
# optional scope:一个可选的修改范围。用于标识此次提交主要涉及到代码中哪个模块。
# description:一句话描述此次提交的主要内容,做到言简意赅。
常用的 type 类型:其实项目团队内部也可以自定义一些类型,只要自己清楚就可以了 
使用 commitlint 可以规范我们每一次的 commit,我们可以用来自动生成 changeLog 等文件,方便代码管理。
具体可学习以下链接: 前端codeLint-- 为项目集成ESLint、StyleLint、commitLint实战和原理
四. 小结
husky版本不同,配置的方式也不一样, 方式一方式二均可以实现自定义commit-msg的需求, 推荐使用方式二